NOTE: The screen shots need updating for DX4WIN 8/9, but the flow is the same. All of the exporting and importing is now done through the QSO Window: LoTW menu.
NOTE: I updated some of the text for DX4WIN 8 on 11 January 2011. I still
could do a better job here.
NOTE: I updated some of the text for DX4WIN 9 on 20 June 2020.
This note gives a step-by-step guide for working with ARRL's Logbook of the World (LoTW). This guide assumes the following:
- TrustedQSL software from ARRL has been installed
- Certificate has been loaded
- Station locations have been setup in TQSL program
ARRL members who are logged into the ARRL web site may want to download and read this article written by H. Ward Silver, N0AX that appeared in QST September 2005:
The LOGBOOK of The World - 75 Million QSOs Can't Be Wrong!
The round trip process (DX4WIN -> ARRL -> DX4WIN) involves these steps:
- Check your QSOs
- Identifying the DX4WIN QSOs to upload
- Exporting the QSOs from DX4WIN
- Signing the exported log
- Uploading the signed log to ARRL
- Downloading the confirmations from ARRL
- Importing the confirmations into DX4WIN
The steps are described in more detail below.
Check Your QSOs
A common mistake is to log a QSO with the mode "PSK". This is NOT a valid ADIF mode for export. If you meant "PSK31", do an F8 search for "PSK" in the Mode field, and change it to "PSK31". Then save your log.
DX4WIN 8: You can NOT select PSK as a mode, so this is a non-issue.
Identifying the DX4WIN QSOs to upload
DX4WIN will only upload QSOs for which the "Upload" flag is set to "Y". If you can't see this field, use F5 a couple of times to expand your QSO window.
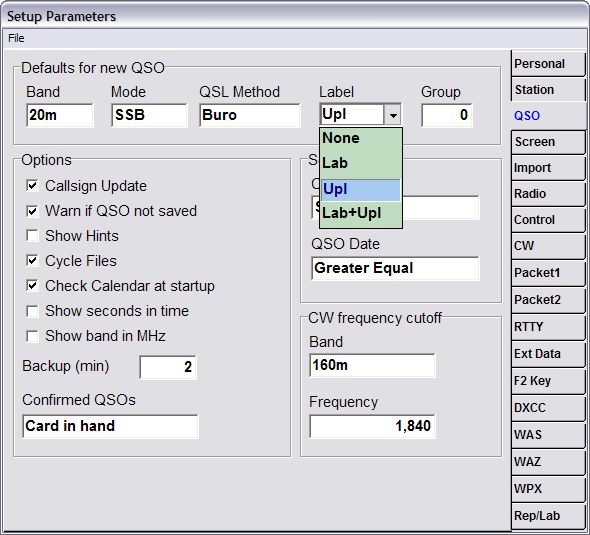
There are two methods of marking QSOs for upload. The most convenient is found in your DX4WIN QSO preferences. In the Label box, select "Upl" or "Lab+Upl":
DX4WIN 8: The Label box has three check boxes. Check the LoTW box.
This will automatically set the upload flag for every QSO you log from now on (select the "Lab+Upl" option if you want QSOs to be marked for a QSL label). Make sure to save the change when exiting the Setup Parameters window (File -> Save Changes and Exit).
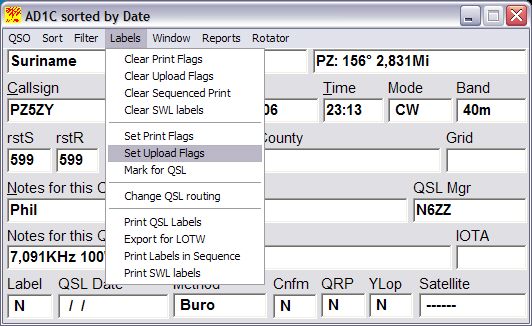
If you want to upload QSOs for which the upload flag is not already set (or go back and set the upload flags for all old QSOs), you can do this through the Labels menu in the QSO window. Choose Labels -> Set Upload Flags:
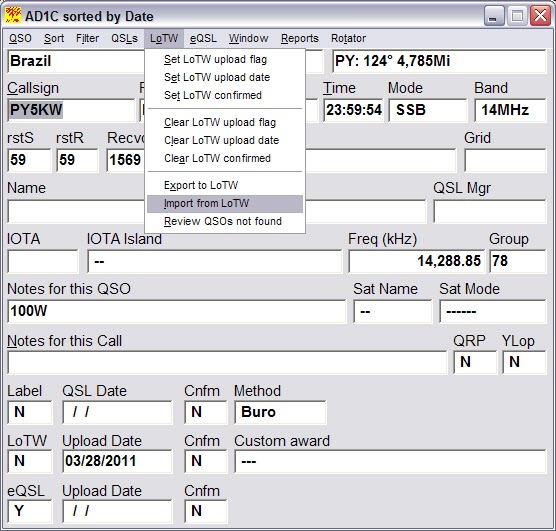
DX4WIN 8/9: From the LoTW menu, select "Set LoTW Upload Flag"
This will set the upload flag for all QSOs in the current filter selection. If a QSO's Upload Date is already set, that QSO will not be marked for upload again.
Exporting the QSOs from DX4WIN
After identifying the QSOs to be exported, you can export them using the Labels menu in the QSO window. Choose Labels -> Export for LoTW:

DX4WIN 8/9: From the LoTW menu, select "Export to LoTW" (before 8.05, it's called "Export for LoTW")
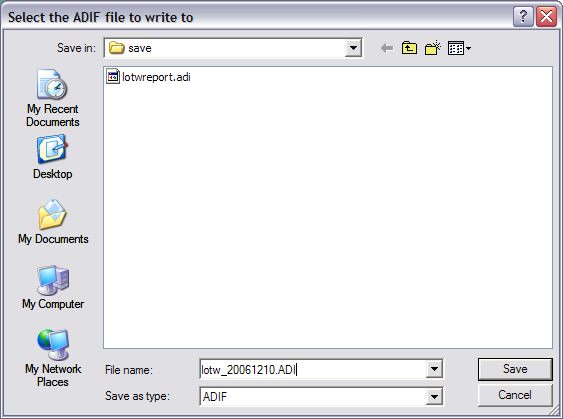
The "Select the ADIF file to write to" window will appear. Give the file a meaningful name that you will remember. Since you may be doing this on a regular basis (to export your newest QSOs), you may want to include the export date in the file name, i.e. lotw_2061201.adi. DX4WIN will save the marked QSOs in the file you specify:
You may get a pop-up window if you have a filter active. Select Yes to export using the current filter, No to export without using the filter, or Cancel to abort the export process.
After exporting the QSOs, DX4WIN will clear the upload flags and set the upload date for the exported QSOs. You may get a warning about a filter selection not being active, it's OK to proceed.
Signing the exported log
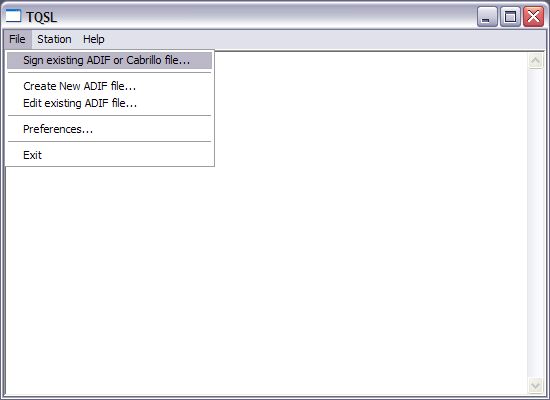
Start the TQSL program and go to File -> Sign existing ADIF or Cabrillo file:
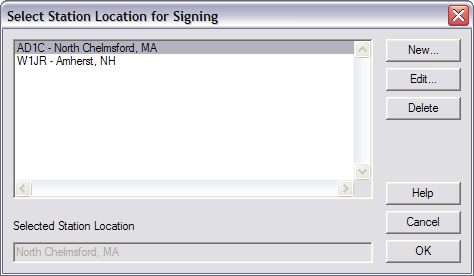
Pick the station location that was used when making the QSOs to be signed, then click on OK:
Now navigate to your DX4WIN save directory, where you saved the LoTW ADIF file, and click on the file name (in this case, lotw_20061210.ADI):
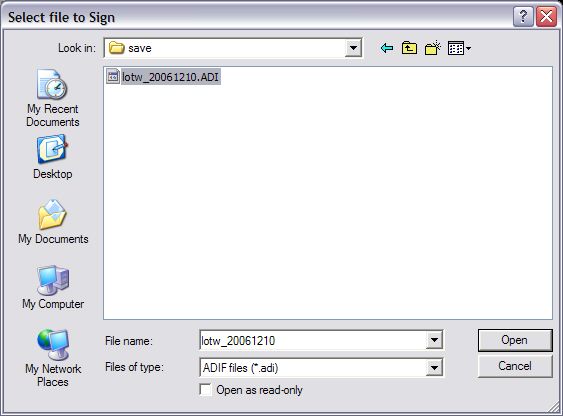
Click the "Open" button, and you will get another dialog box to save the signed (.TQ8) file. A file name should already be filled in, and should match the name of the .ADI file you selected:

Click the "Save" button. You will be prompted to Confirm signing using the log and Station Name you provided:
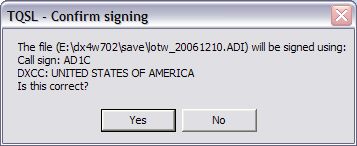
Click the "Yes" button. Next, you will get a dialog box prompting for the QSO Date Range:
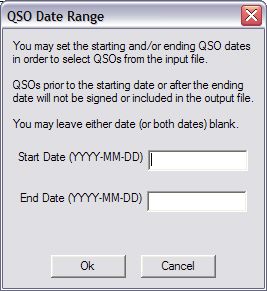
Just leave this blank, unless you want to sign only part of your exported log. Click the "Ok" button to proceed.
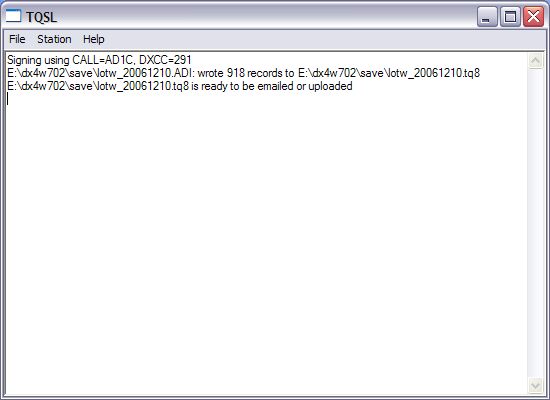
You will get a pop-up box showing the signing progress. When all the QSOs have been signed, TQSL will display the name of the input and output files and tell you how many QSOs were signed:
It's possible that an error occurred while signing the log. The TQSL program does some basic checks for bad callsigns, bad modes and other things. If an error occurs, you will have a choice to continue or stop. If you have a systematic error (like the PSK/PSK31 problem described earlier), it might be better to stop and fix all these errors in your log. If you expect only a few errors, then just continue (ignoring all errors) and fix them one-by-one.
In either case, you need to export your log again and sign the newly-exported file. The easiest way to do this is using an F8 search for today's date in the "Upload Date" field, then using QSO -> Multiple QSO Operations -> Set Upload Date, change the date to "blank". Then you will need to set the Upload flags again, using Labels -> Set Upload Flags. Finally, export the log using Lables -> Export for LoTW as described above.
Once you have an error-free, signed log, you can exit the TQSL program using File -> Exit. Your log has been signed and is ready to upload to ARRL.
Uploading the signed log to ARRL
Log into your LoTW account on the ARRL web site using this URL:
https://p1k.arrl.org/lotwuser/default
Click in the box near the top of the LoTW web site that says "Upload File". In the "File to Upload" box, click on the Browse button and navigate to your DX4WIN SAVE directory (i.e. C:\Program Files\DX4W702\SAVE). Find the name of the signed .TQ8 file and double-click on it. Then click on the "Upload file" button.
The QSOs will be uploaded to and queued up on the ARRL server. New confirmations may not be available right away. It sometimes it takes minutes, other times hours, depending on how many logs are pending for upload.
Downloading the confirmations from ARRL
After you are satisfied that all confirmations have been processed, you can download the confirmations from the server. Click in the box near the top of the LoTW web site that says "Your QSOs". Next, click on the box on the left that says "Download Report". The following page should appear:
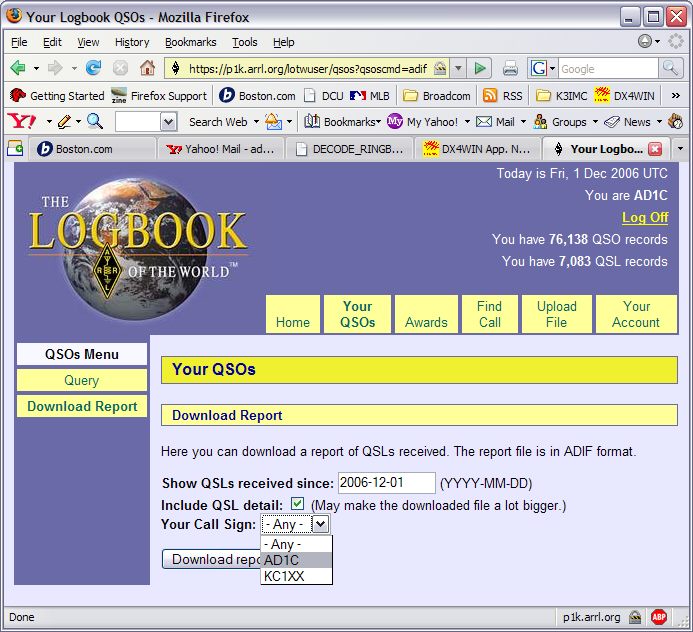
The box "Show QSLs received since" will usually have the date you LAST downloaded the LoTW report. In other words, by default, you are only downloading new confirmations, not all confirmations. Remember this is the date that confirmations were received (the date that second of the two logs containing the QSO was uploaded), it has nothing to do with when the QSOs actually took place. You can change the date if necessary.
There is a check box next to "Include QSL detail". If you want your logbook fields like state, county, IOTA, etc. populated with data from your LoTW confirmations, check this box. Note that some people have NOT filled in their LoTW certificates correctly, CQ and ITU zones may be swapped, etc.
Finally, select the callsign in the "Your Call Sign" box. People who have multiple certificates will have multiple callsigns listed here.
Then, click on the "Download report" button to download the ADIF file. You will be prompted for the location to save the file. It's easiest to navigate to your DX4WIN SAVE directory (i.e. C:\Program Files\DX4W702\SAVE) and save the file there. The default name is lotwreport.adi
The lotwreport.adi file contains only QSOs which match in the system. If you have uploaded QSOs that are no confirmed, then they will not be included in the report file.
Importing the confirmations into DX4WIN
IMPORTANT for DX4WIN 7 users: Before importing the ADIF LoTW report, in your QSO Preferences (File -> Preferences -> QSO tab), make sure that "Confirmed QSOs" in the bottom-left corner is not set to "Upload conf". Otherwise, DX4WIN will not set the "Upl Cnf" field in the logbook. This is not an issue for DX4WIN8.
Import the LoTW report file the same way you would import any ADIF log. File -> Import/Export. When the Import/Export Filters window comes up, ADIF should be selected automatically. In that window, choose File -> Import:

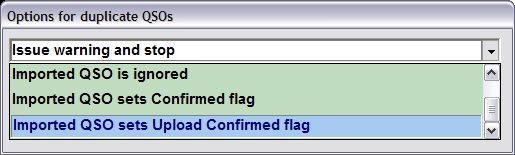
When the "Specify file for import" window appears, double-click on the file named lotwreport.adi (unless you changed the name when you downloaded the file from the ARRL web site). A pop-up will appear, "Options for duplicate QSOs". Use the down-arrow to select, "Imported QSO sets Upload Confirmed flag":
Once the option is selected, type ENTER to update your log. DX4WIN will inform you how many QSOs were confirmed. Finally, use File -> Exit to close the Import/Exit Filters window.
DX4WIN 8: From the LoTW menu, select "Import from LoTW"
(before 8.05, it's called "Import for LoTW")
DX4WIN 9: from the LoTW menu, select "Confirm LoTW using ADIF
file"
If you included QSO detail with your LoTW report download, various fields in your logbook may have been updated. To see these changes, use F8 to search your log, enter LOTW into the blank "Notes for this QSO" field, then ENTER:
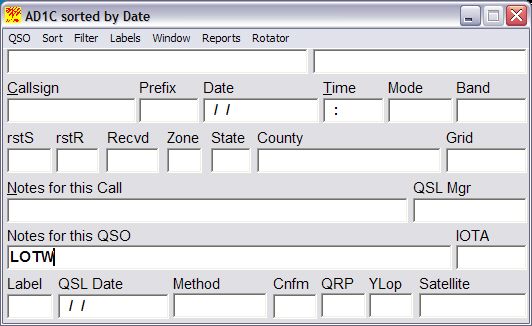
DX4WIN 8/9: Search for the word "Import" in the "Notes for this QSO field" instead of LOTW.
You can move through your log using Page Up/Down to see the changes.
Preparing a DXCC submission
First, see ARRL DXCC web page FAQ about submitting a hybrid application. There is no straightforward way to prepare a DX4WIN submission report when both QSL cards and LoTW credits are submitted. This is because you may have both a QSL and a LotW confirmation for the same QSO, and DX4WIN doesn't know which one you would like to submit.
If the number of LoTW confirmations is relatively small, you can do a regular DXCC submission report, then save it to a .CSV file (by right-clicking on the report window). Open that .CSV file in Excel (or another spreadsheet program), and delete the QSOs that will be submitted through LoTW.